How do I add a new employee to the payroll system (basic onboarding)?
If you're set up for basic onboarding, you are in the right place. Otherwise, look for the interactive onboarding tutorial.
Watch this video or follow the step-by-step instructions below.
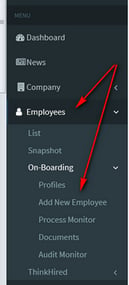
Navigate to the Administrative Payroll Dashboard and click Employees.
Click on On-Boarding, and then select Add New Employee.
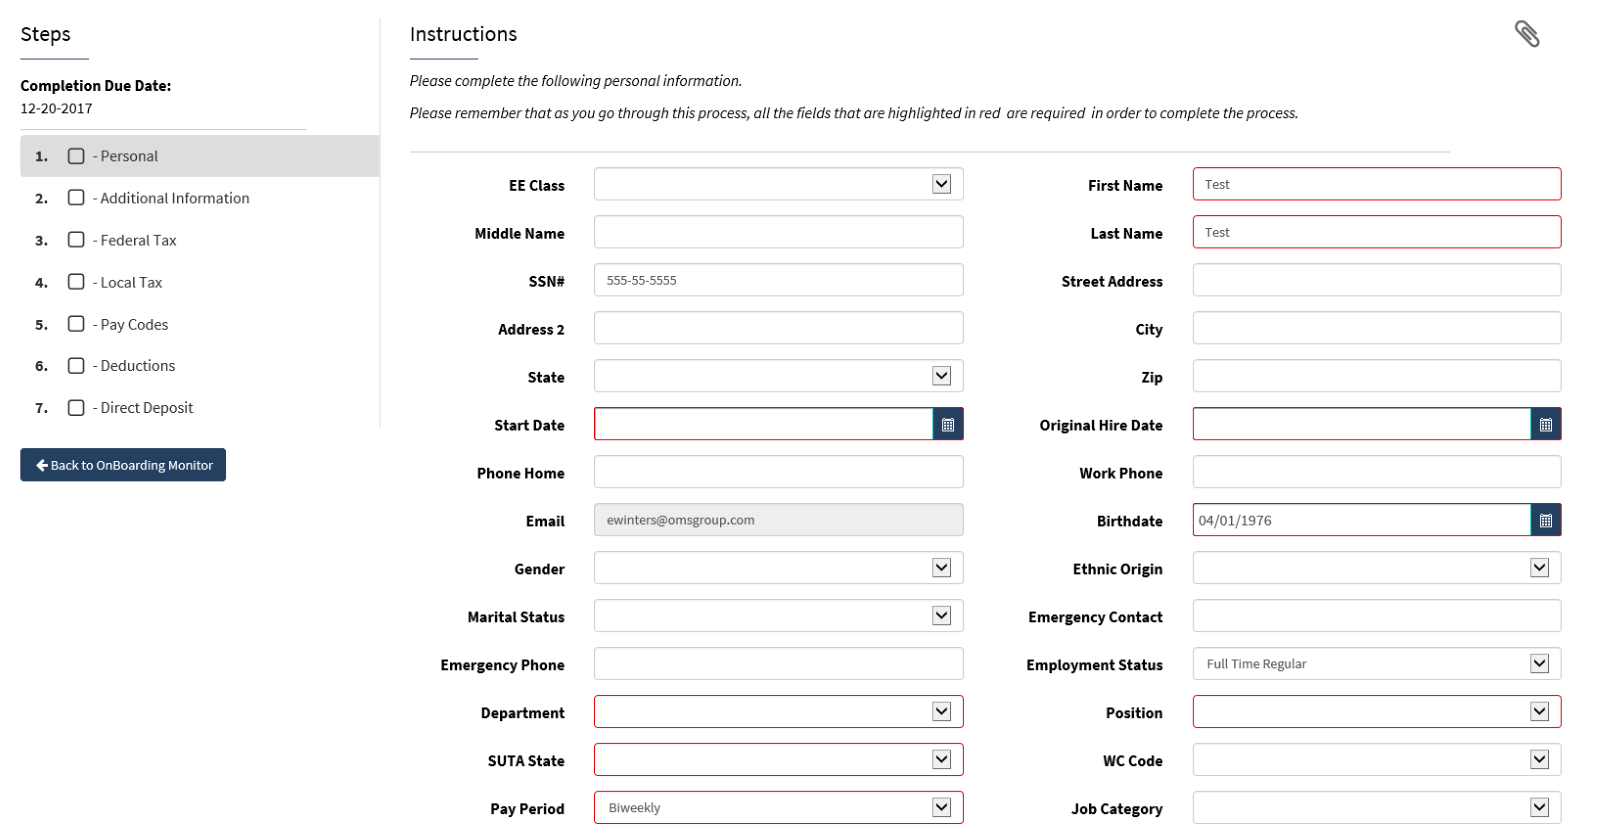
All data in red is required.
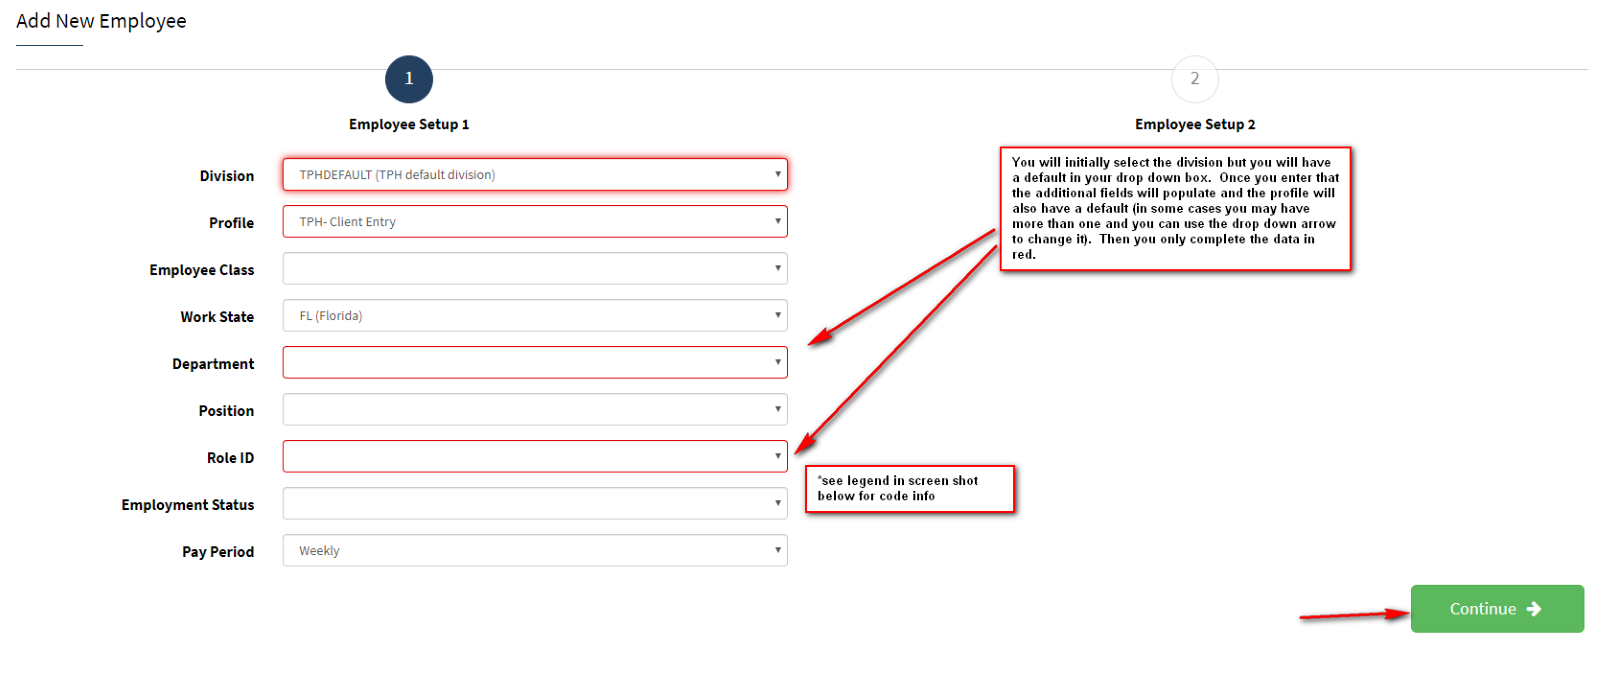
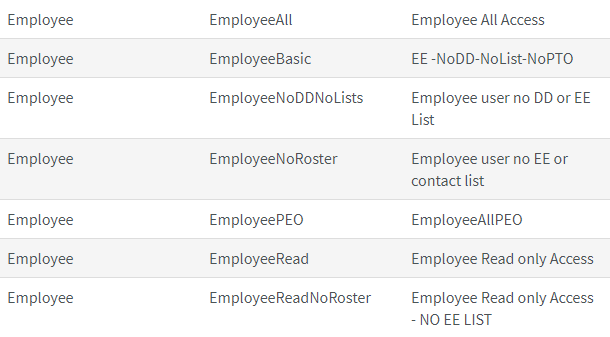
Note: There are various options in the drop-down menu but your company's role will default based on what was assigned at implementation. DO NOT CHANGE YOUR ROLE ID FIELD.

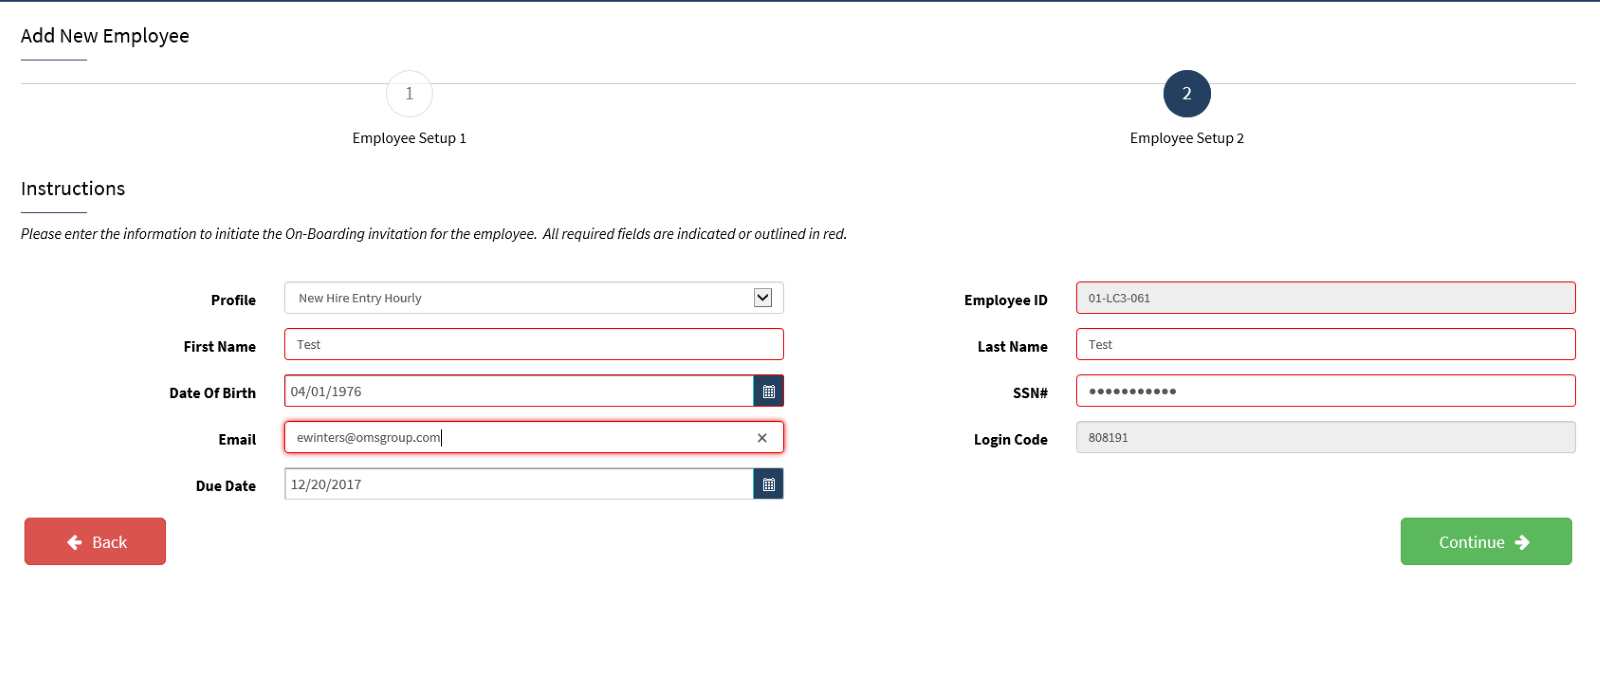
You will complete all the information that you want to record. All data in red is required. The system will walk you through each step that is listed on the left side. Each section will advance as you enter the required data and click Continue.
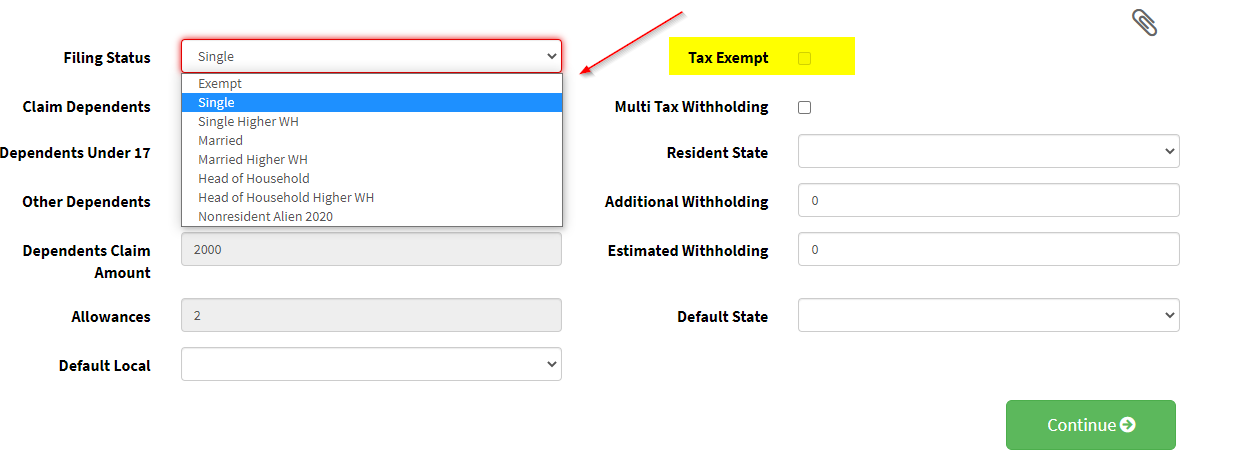
Federal Filing is entered based on what the employee completed on the 2020W4 form and you will enter using the drop-down box. If you need assistance in the breakdown of status options click here to access the W-4 Data Entry page.
This brings you to the next task – PAY CODES
You will choose YES here and select the main earning type (either Hourly or Salary) and enter the dollar amount. This message will keep popping up until you have added all the pay codes and then you choose NO to move to the next task. For more details about adding direct deposits click here to access the Direct Deposits Guidance page.
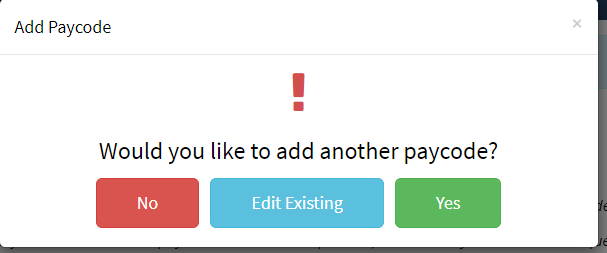
Please note that you may not have all the tasks in the sample screenshot. You will move through each item that is assigned to your onboarding profile.
Once all these fields have been updated you will get a summary that looks like the screenshot below. This reflects all the completed data.
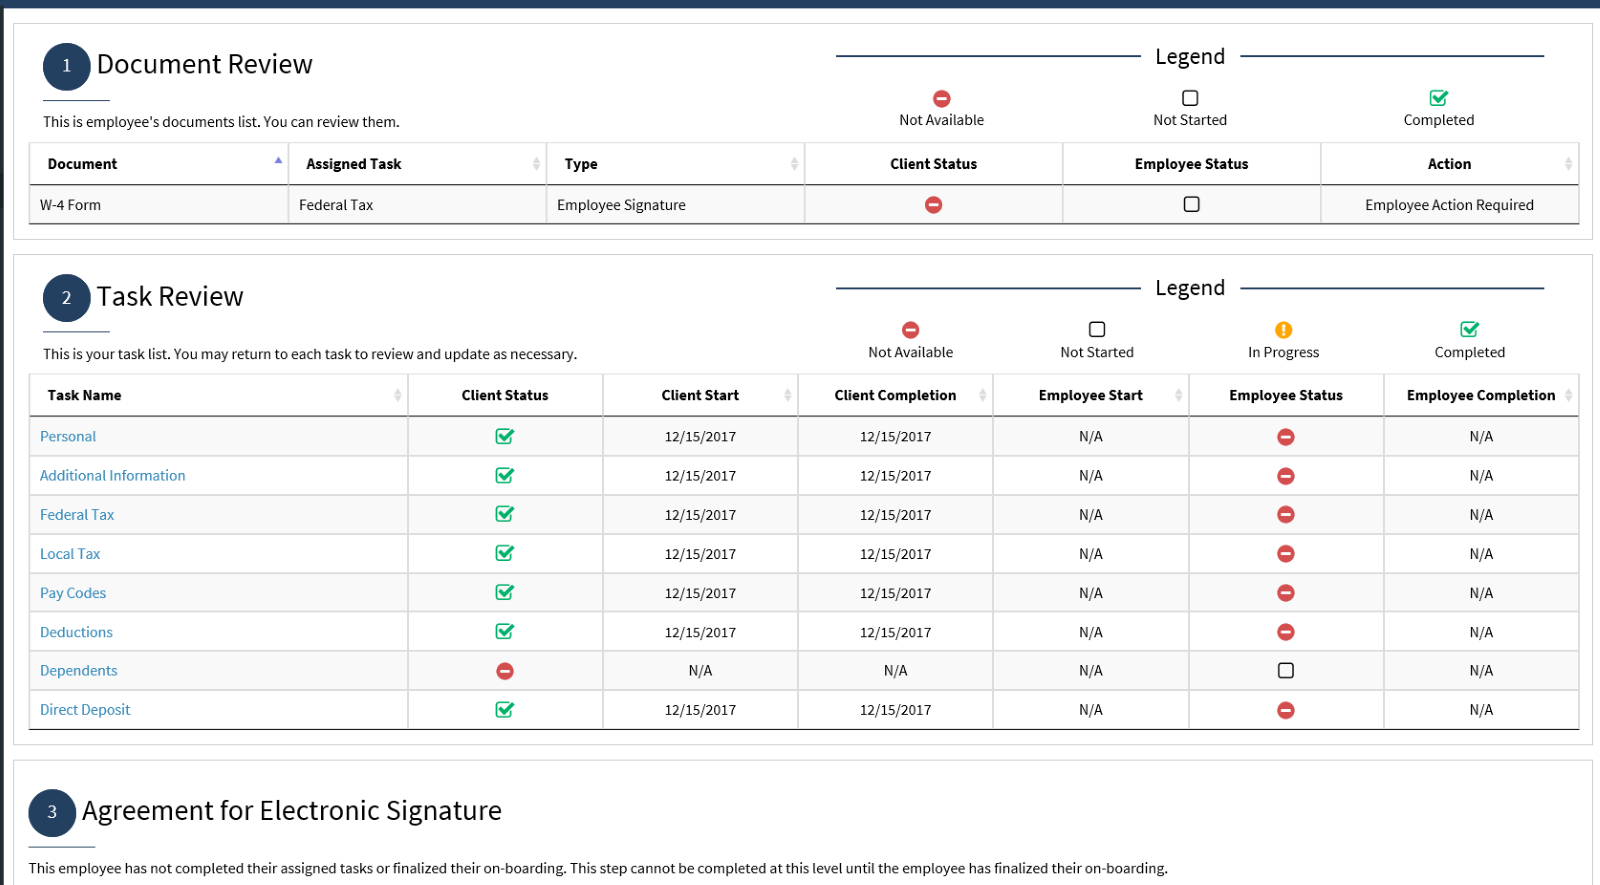
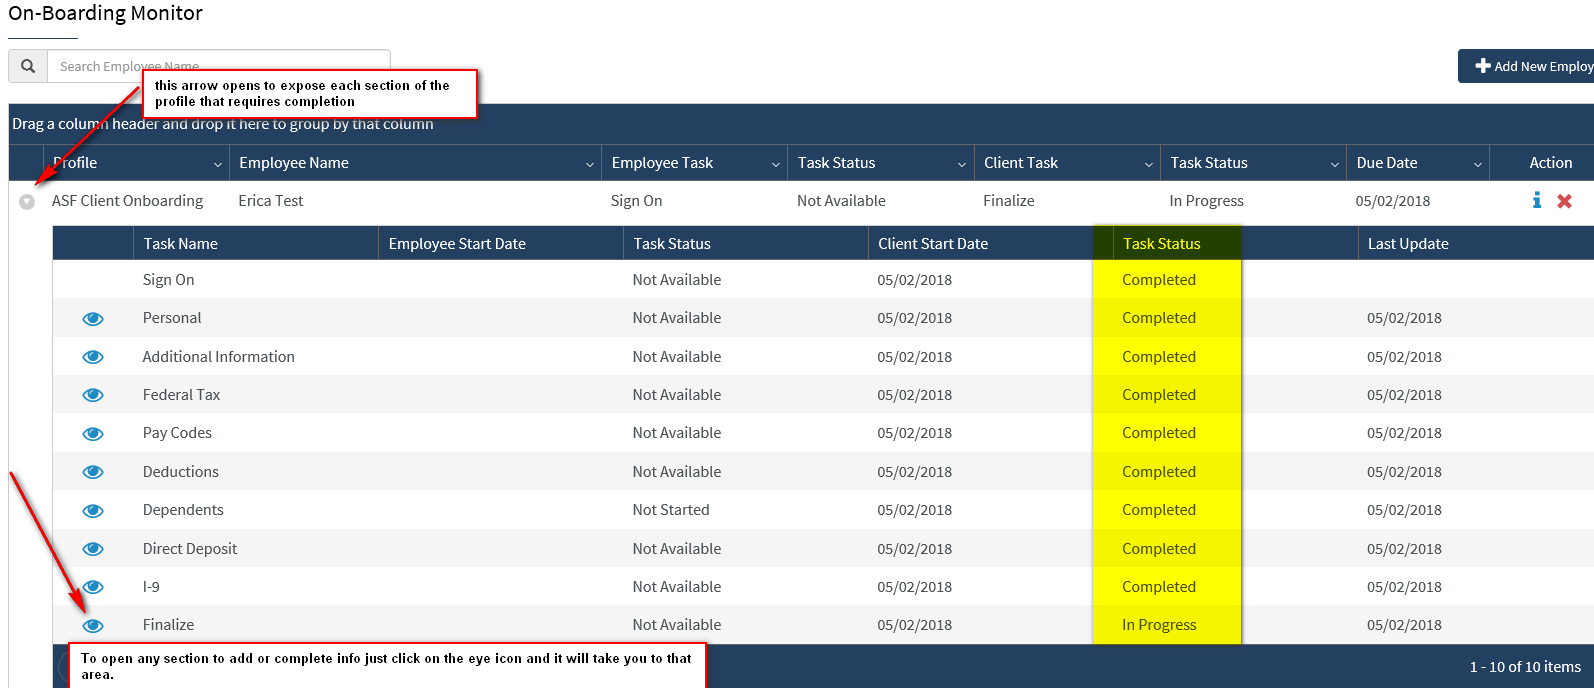
Please note that you can come in and out of this process as many times as you need to. If you leave the data entry and need to access the setup again you will go to the main menu and select Employees. Click on Onboarding, then Process Monitor. This shows you whom you have and if you click the grey arrow you can drill down into the profile to see what needs to be completed.
FINAL SECTION, Set-up log-in credentials for the new employee:
After completing all of the nine required sections, then you will be prompted to set up the login credentials for the new employee.
The system auto-generates the UserID as the first initial of the employee's first and last name (it adds numbers if duplicate names exist).

The email address entered is where any emails will be sent should the employee use the “forgot userID/forgot password” resets on the login page. My suggestion is that the password ALWAYS follows the same format for each new hire so that you do not have to keep it.

After you set the new employees' password you are ready to finalize the employee and release them to the active employee list. The final step is acknowledging the information you keyed in and you will not see this 3rd step until you have set the user up.

To complete the section above and release the employee to payroll, you must check the box and enter YOUR username and password, then click the "Sign & Finalize" button in the lower right corner.
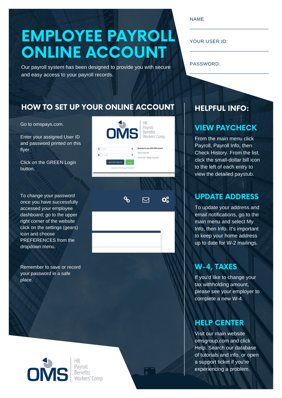
You must provide the new hire with the UserID and password you just set up for them. This is their access to the online system. The new hire will enter the UserID/Password you just created and use the GREEN login button. You can provide them with this flyer to help them start using their new log-in. Click Here To Download Employee Flyer
Employees to Reset Generic Password after initial login:
If you use a generic password formula for the new hires (i.e. Resetme123) then you will need to show the employee that they can make their password personal after their first login.
To change the generic password, the new hire logs in for the first time with what you assigned them and navigates to My Info, and then clicks on Preferences. Selecting Click to Change Password allows the new employee to generate their own unique password.
