How do I add users for website access?
Creating new users gives them access to the time clock and the ability to change their personal information online.
Navigate to the main menu on your Administrative Payroll Dashboard.
Go to the Company menu. Click on Setup, then Users.

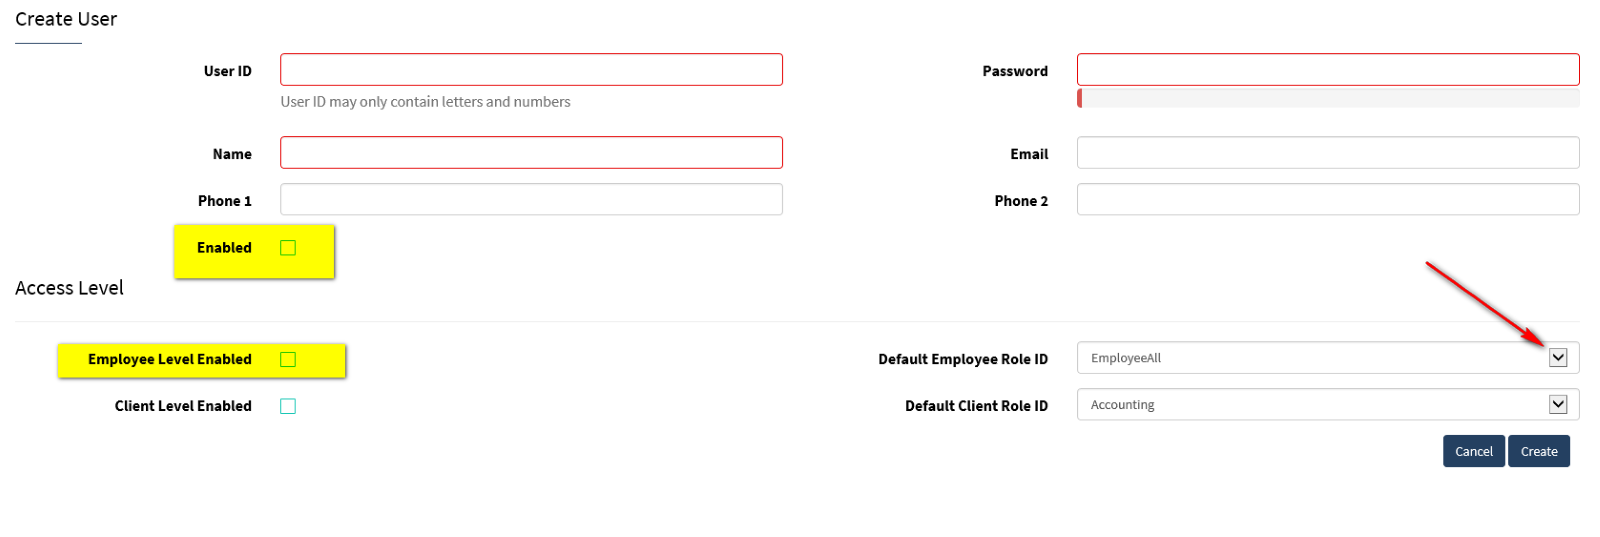
This will show you all the existing users, the user ID, employee name, and email address along with how many times they’ve logged in and the last login date. To create a new user, you must click Create New in the upper right-hand corner of the user page. You will then create a User ID and Password for the individual (all boxes in red must be completed). You must also enable the User ID and the Employee Level by checking both highlighted boxes.

Default Employee Role ID
The Default Employee Role ID gives full access for the employee to see and change their personal data and direct deposit along with seeing the company list of employees. The drop-down menu contains different roles that you can assign the employee level user so be sure to be consistent in your setup. If you have questions about what role to use please contact OMS. Once you have created the user then you must assign the employee to the user ID you created for them by clicking Edit Employee Access.

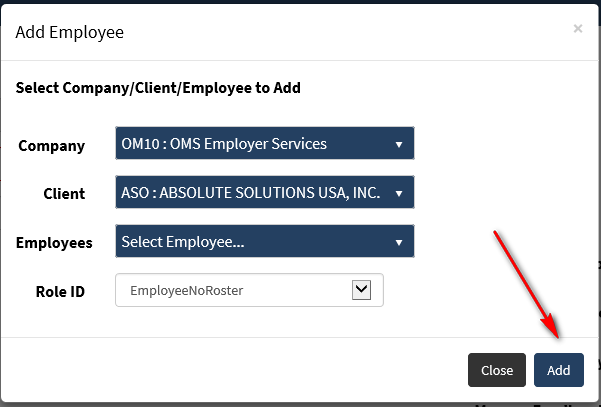
This new window will appear. You will need to use the drop-down menu to find your company in the database, then select your employee and add them.
The main company (1st drop down) will be OMS Employer Services. The client (2nd drop down) will be your company and the employees (3rd drop down) will be your active employee list.

Using Online Timeclock
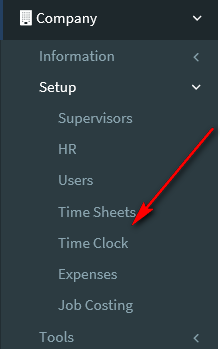
If you use the online time clock, navigate to Company then Setup, and click Time Clock.

When you click on the assign button it will bring up a list of all your users and you simply check the box next to their name and save.

If you need to REMOVE an employee from the timeclock (i.e. they go from hourly to salary) then you simply uncheck the box and it removes the timeclock.